A project brings tasks, documents and people together around one goal: a product, a client, an area of work. Each project has its own task list, its own knowledge base and its own access rights.
Where to find it
Sidebar → Tasks → Projects — all projects you have access to. The My projects switch leaves only the ones you own.
How to create a project
Managers and administrators can create projects.
- On the Projects page, click New project.
- Enter a name and a short description.
- Choose a color — it marks the project in lists and on task cards.
- Choose the access: Public or Private (see Project access).
- Click Save.
You become the project owner. The project code (for example, mobapp) is generated from the name — task numbers start with it: mobapp-1, mobapp-2.
Project page
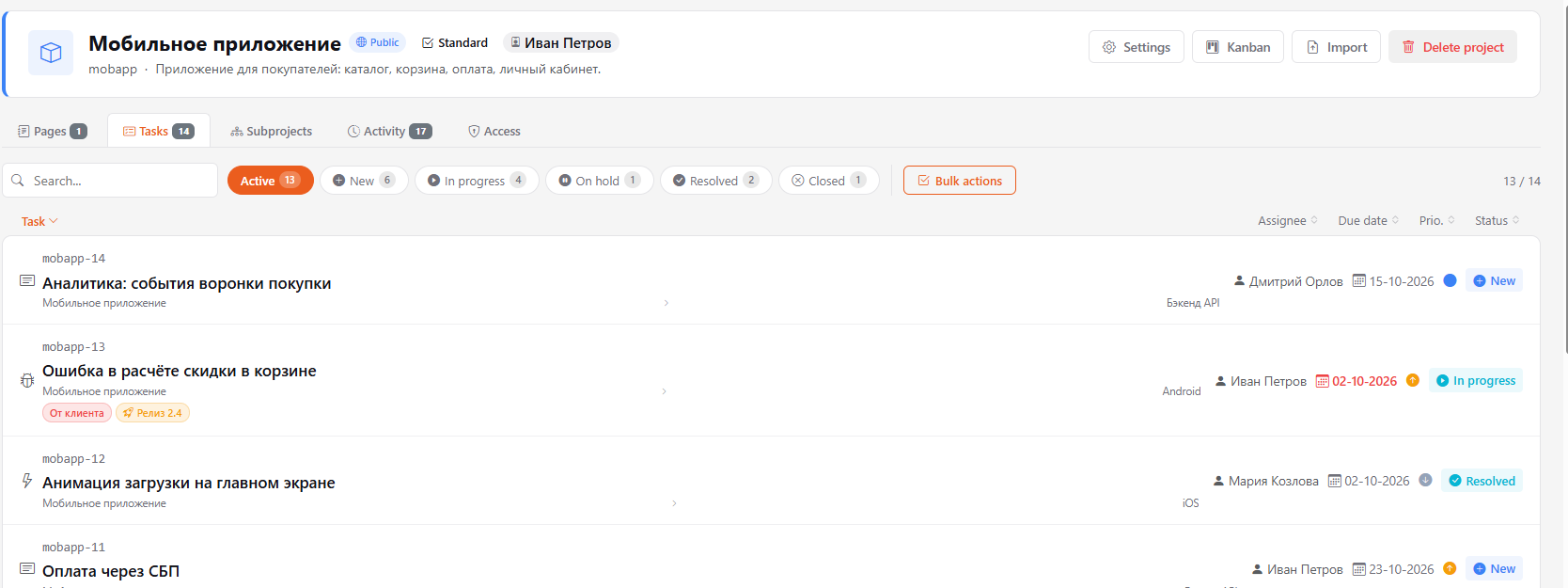
At the top — the name, access, supervisor and action buttons. Below — the tabs:
- Pages — the project knowledge base: documents, instructions, agreements.
- Tasks — all project tasks: search, status filter and sorting by columns. The Bulk actions button lets you select several tasks and change their status, assignee or subproject, or add a tag, all at once.
- Subprojects — parts of the project, see Subprojects.
- Activity — the event history of the whole project.
- Access — who sees and edits the project. Visible to those who can manage the project.
Project settings
The Settings button opens the name, description, mode, access and the project Supervisor. You can also change the supervisor by clicking their name in the project header.
The supervisor automatically becomes the assignee of new tasks in the project. Make the person who triages incoming tasks the supervisor — and no task will be left without an owner.
Importing tasks
The Import button creates many tasks at once from a file — for example, when moving from another system.
- Click Import and get the template via Download template.
- Fill in the table: the "Title" column is required; "Description", "Due date", "Comments" and "Closed date" are optional.
- Upload the file. The tasks appear in a list for review.
- If needed, choose a tag for all tasks, their status, and the default author and assignee, then confirm the import.
Deleting a project
The Delete project button is available to the project owner and administrators. A project that still has tasks or filled pages can't be deleted — move or delete them first. To confirm, you need to type a control word.